

Migrate to Token-based Push NotificationsYou can check out our new Token-based implementation here.
- Chrome 50+
- Firefox 44+
- Edge 17+
- Opera 42+
Step 1: Add Firebase to your app
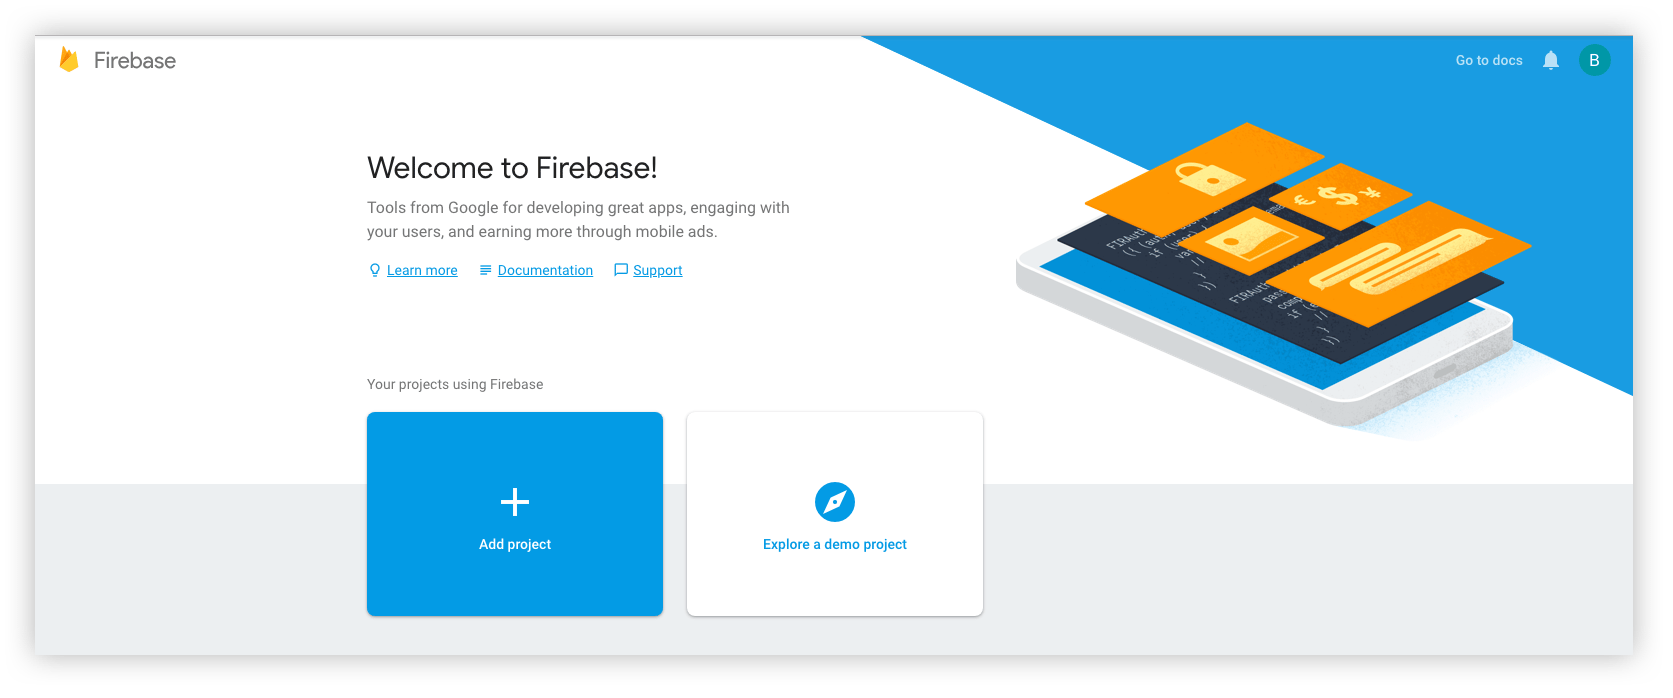
To configure Firebase Push Notifications for your apps create aFirebase project at Firebase Console.
If you have previously not created a Firebase project for your app Click Add project. If you already have created a project for your app in which you wish to integrate CometChat, select the same project and download the config file.
Step 2 : Obtain Firebase configuration for your platform
For Web
- Sign into Firebase and open your project.
- On the Overview page, click Add app.
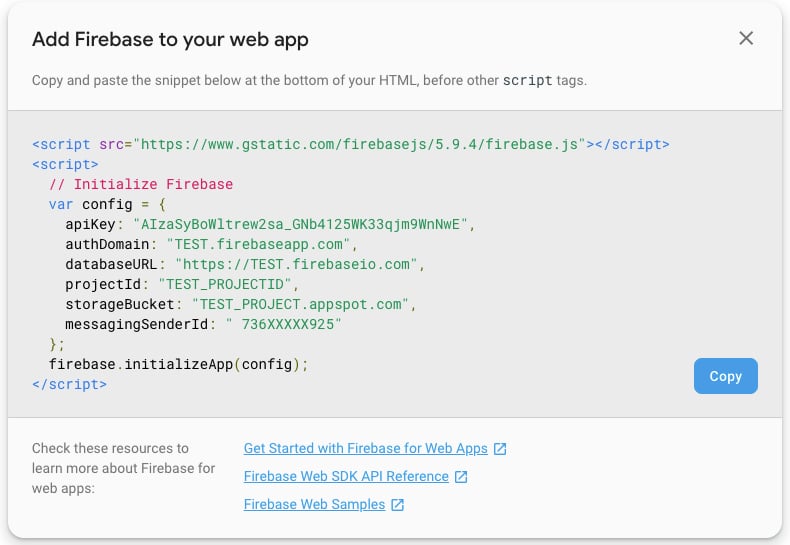
- Select Add Firebase to your web app.
- Copy the snippet and add it to your HTML application.
For Android
- Sign into Firebase and open your project.
- On the Overview page, click Add app.
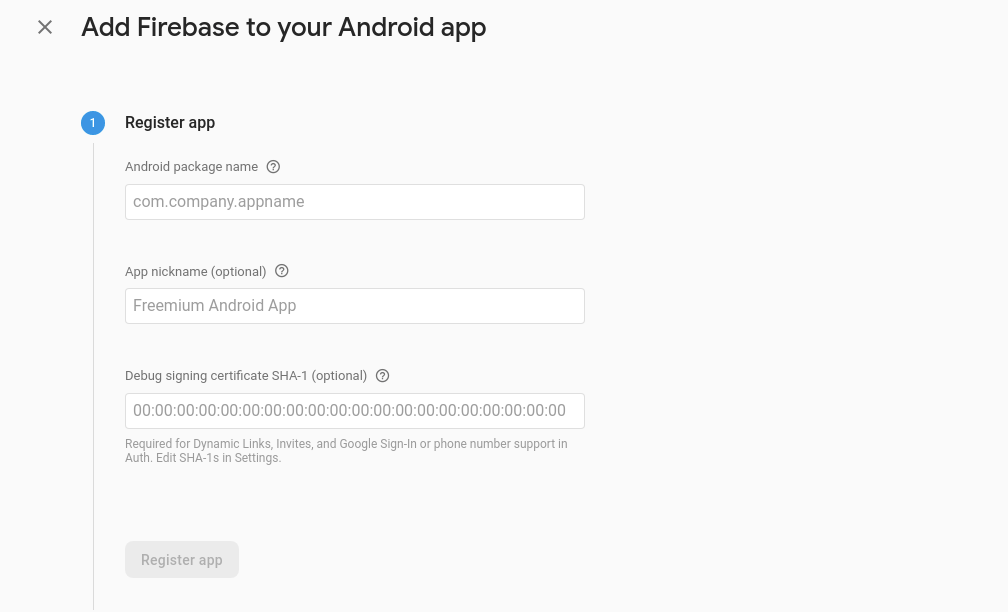
- Select Add Firebase to your Android app.
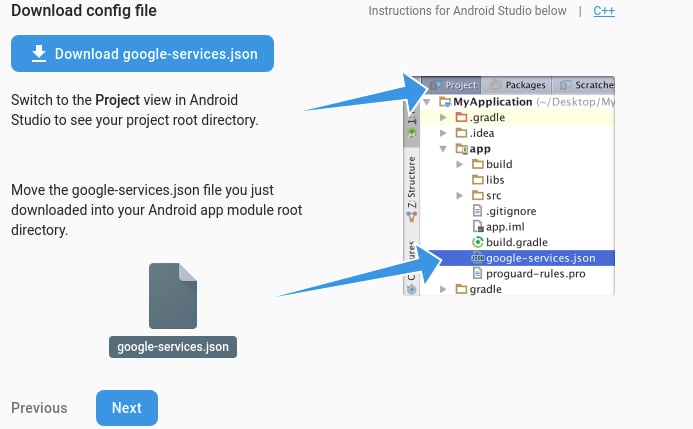
- Follow the on-screen instructions and finally download the google-services.json file.
For iOS
- Sign into Firebase and open your project.
- On the Overview page, click Add app.
- Select Add Firebase to your iOS app.
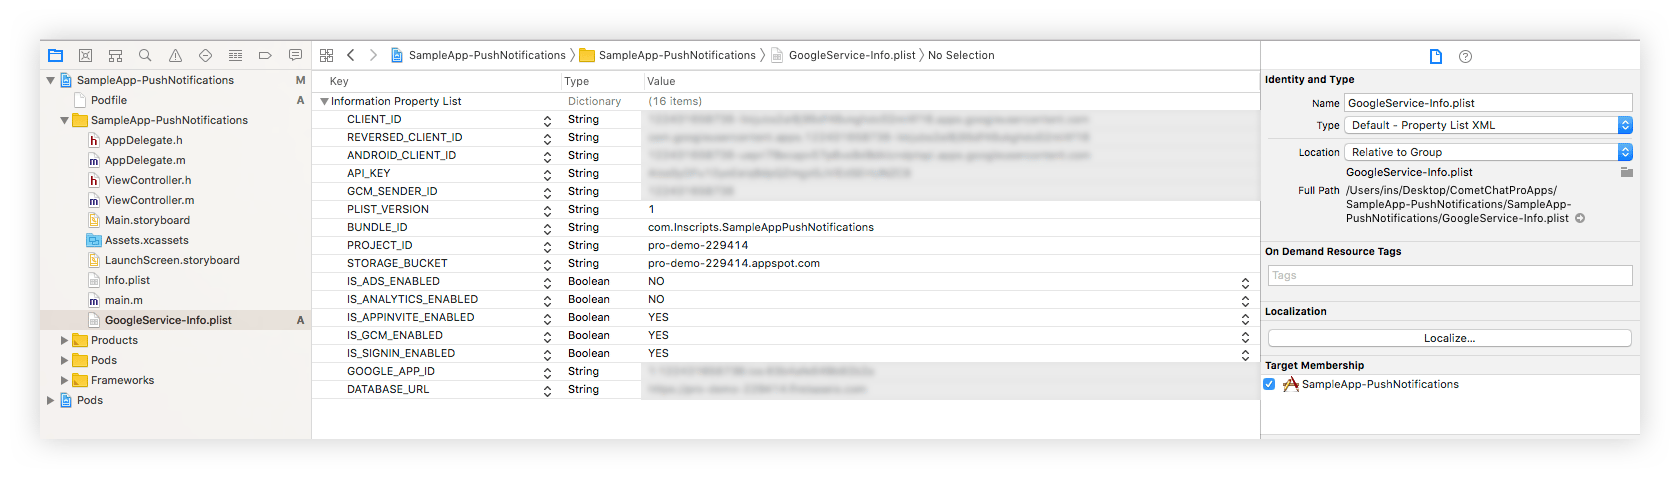
- Enter the relevant details like your bundle ID and download the GoogleService-Info.plist file.
- Move this plist file to the root of your XCode project. If prompted, select to add the config file to all targets as follows:
For React Native
- For React Native to Android, you need to download the
google-services.jsonfile. - For React native to iOS, you need to download the
GoogleServices-Info.plistfile.
For Capacitor, Cordova & Ionic
- For React Native to Android, you need to download the
google-services.jsonfile. - For React native to iOS, you need to download the
GoogleServices-Info.plistfile. - For web, you will need the Firebase Config object.
Step 3: Extension setup
-
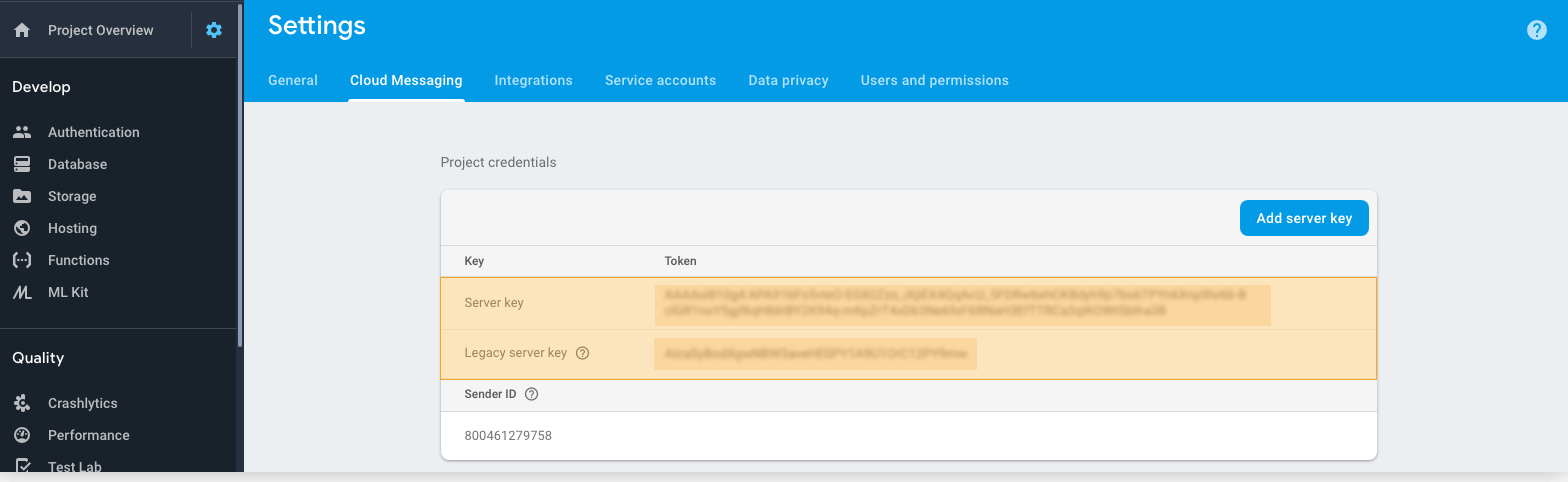
You need the Firebase Service key which you can get from Firebase console.
- Open your Firebase app
- Click on the Settings Cog in the left navigation menu
- Select Project Settings and go to the Cloud Messaging tab
- Add a Server Key and copy it for further use.
- Login to the CometChat Dashboard and select your app.
- On the Extensions page, enable the Push Notifications extension.
- Open the Settings for this extension.
- Enter FCM Server key.
- Select the platforms of choice.
- Enter the title for notifications.
-
You can also toggle the triggers for sending Push Notifications. The triggers can be classified into 3 main categories:
- Message Notifications
- Call Notifications
- Group Notifications
Step 4: Application Setup
In order to use the topic-based Push Notifications, you need to subscribe to topics. In case of CometChat, you need to subscribe to 2 different types of topics:- Topic to receive Push Notifications for one-on-one messages and calls.
- Topic to receive Push Notifications for group messages and calls.
- Subscribe to one topic
- Subscribe to all the topics
For Web
1. Installing Firebase SDK
- npm
- yarn
- JavaScript
2. Initialize Firebase app
- Create a index.html file and initialize the Firebase app. This has to be done only once.
- Here, you will need the Firebase Configuration object that you copied from the Firebase Console.
- Also, register the service worker.
- JavaScript
- JavaScript
3. Request permission for Web Push
- Create PushNotification.js file.
- Insert the following code so that the browser asks for permission to show Push Notifications.
- If the permission is granted, you will receive a FCM registration token.
- JavaScript
4. Subscribe to topic(s)
- In the success callback of CometChat.login(), you can start the subscription process.
- As mentioned earlier, you can either subscribe to one topic or subscribe to all.
- The format for the name of user topic is
AppID_user_UID - The format for the name of a group topic is
AppID_group_GUID
- Subscribe to all
- Subscribe to User topic
- Subscribe to Group topic
5. Receive Messages
Create a firebase-messaging-sw.js file which will handle showing notifications- firebase-messaging-sw.js
6. Unsubscribe from topics
Before you logout the user using CometChat.logout() method, you can unsubscribe from topics to stop receiving Push notifications for a logged out user.- Unsubscribe from all topics
- Unsubscribe from User topic
- Unsubscribe from Group topic
7. Handle Custom messages
To receive notification ofCustomMessage, you need to set metadata while sending the CustomMessage.
- JavaScript
For Android
1. Setup client app
To enable Firebase products in your app, add thegoogle-services plugin to your Gradle files.
In your root-level (project-level) Gradle file (build.gradle), Check that you have Google’s Maven repository.
In your module (app-level) Gradle file (usually app/build.gradle), apply the Google Services Gradle plugin and add the dependencies for the Firebase Cloud Messaging.
- build.gradle (project-level)
- build.gradle (app-level)
2. Using FirebaseMessaging Service & Broadcast Receiver
FirebaseMessagingService provides a method which helps to register token for client app by overriding onNewToken.- Java
3. Subscribe and unsubscribe to topic(s)
- After successful login using CometChat.login(), you can start the subscription process.
- As mentioned earlier, you can either subscribe to one topic or subscribe to all.
- The format for the name of user topic is
AppID_user_UID - The format for the name of a group topic is
AppID_group_GUID - You can unsubscribe when the user logs out (i.e. before calling the CometChat.logout() method)
- Java
4. Receive Messages
To receive messages, you need to override theonMessageReceived (RemoteMessage remoteMessage).
- MyFirebaseMessagingService.java
CallNotificationAction.java is a Broadcast Receiver which is used to handle call events when app is in the background.
Since Android O, there have been certain restrictions added for background tasks and users cannot launch intent directly from the service. More details can be found here.
- CallNotificationAction.java
AndroidManifest.xml to make Push notification work in Background as well.
- XML
- Java
For iOS
Apple Developer Portal
The following steps in this section are written on the assumption that you already have an app ID assigned to your client app 1. Create a Certificate Signing Request To obtain a signing certificate required to sign apps for installation on iOS devices, you should first create a certificate signing request (CSR) file through Keychain Access on your Mac.- Open the Keychain Access from the utility folder, go to Keychain Access > Certificate Assistant > Request a Certificate From a Certificate Authority, and then click
- The Certificate Information dialog box appears. Enter the email address that you use in your Apple Developer account, and enter a common name for your private key. Don’t enter CA email address, choose Saved to disk, and then click the Continue button.
- Specify the name of your CSR to save and choose the location to save the file on your local disk. Then your CSR file is created, which contains a public/private key pair.
- Sign in to your account at the Apple Developer Member Center.
- Go to Certificates, Identifiers & Profiles. In the Identifiers > App IDs and select the Push Notifications service under Application Services
- Click the Edit button.
- Under the Push Notifications service, choose which SSL certificate to create either Development or Production.
- In the Generate your certificate pane that appears after the selection, under Upload CSR file., upload the CSR file you created through the Choose File… button. To complete the process, choose Continue. When the certificate is ready, choose Download to save it to your Mac.
- In order to install the downloaded certificate to the KeyChain Access on your Mac, double-click it. You can find the certificate in the KeyChain Access > login > Certificates.
- Type a name for the .p12 file and save it to your Mac.
- Browse to the location where you saved your key, select it, and click Open. Add the key ID for the key (available in Certificates, Identifiers & Profiles in the Apple Developer Member Center) and export it.
- Go to Firebase console and open your project.
- Inside your iOS project in the Firebase console, select settings and then select the
Cloud Messagingtab. - Scroll down to iOS app configuration, click the Upload button for APNS certificate.
- Browse to the location where you saved your APNs Certificates, select it, and click Open.
iOS App Setup
1. FCM Client on iOS Add the Firebase SDK, Add the firebase pods that you want to install. You can include a Pod in your Podfile like this:- Podfile
AppDelegate:
- Swift
- Objective C
application:didFinishLaunchingWithOptions
- Swift
- Objective C
- Swift
- Objective C
- Swift
- Objective C
- The format for the name of user topic is
AppID_user_UID_ios - The format for the name of a group topic is
AppID_group_GUID_ios
- Subscribe User (Swift)
- Subscribe User (Objective-C)
- Subscribe Group (Swift)
- Subscribe Group (Objective-C)
- Unsubscribe (Swift)
- Unsubscribe (Objective-C)
- Swift
- Objective C
CustomMessage, you need to set the metadata while sending the CustomMessage:
- Swift
- Objective C
For React Native
1. Installing Firebase SDK
Install the react-native-firebase package in your project.- npm
- yarn
google-services.json file and place it inside of your project at the following location: /android/app/google-services.json.
Configure Firebase in Android:
To allow Firebase on Android to use the credentials, the google-services plugin must be enabled on the project. This requires modification to two files in the Android directory.
Add the google-services plugin as a dependency inside of your /android/build.gradle.
Execute the plugin by adding the following to your /android/app/build.gradle file.
- build.grade (project-level)
- build.gradle (app-level)
3. iOS Setup
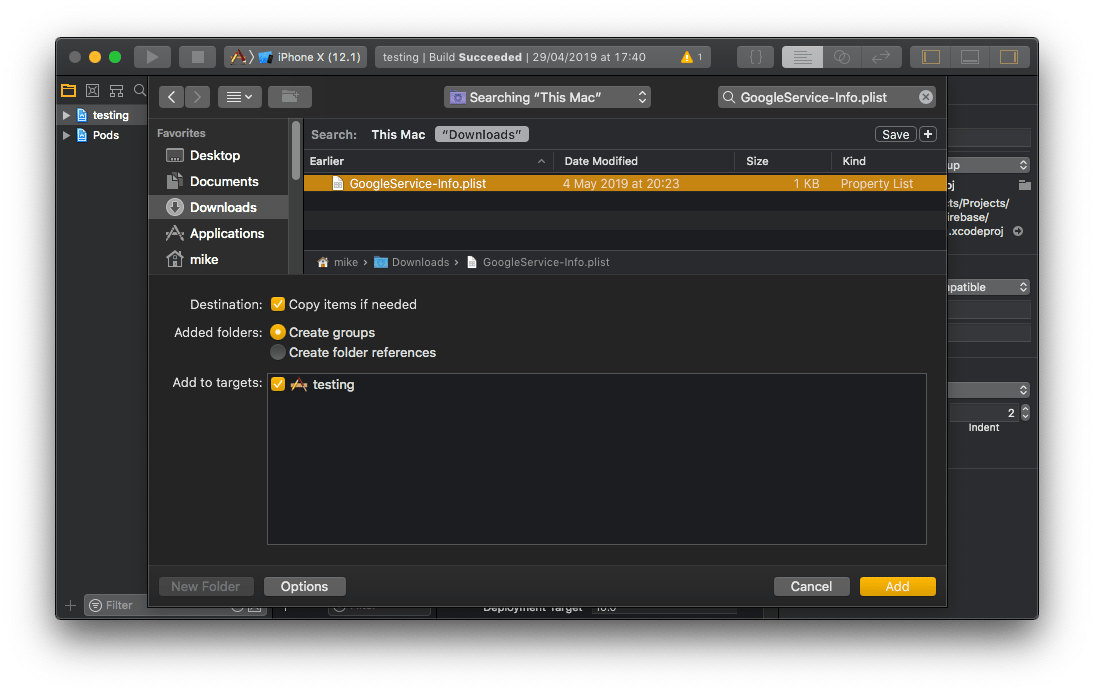
To allow the iOS app to securely connect to your Firebase project, a configuration file must be downloaded and added to your project. On the Firebase console, add a new iOS application and enter your project details. The “iOS bundle ID” must match your local project bundle ID. The bundle ID can be found within the “General” tab when opening the project with Xcode. Download the GoogleService-Info.plist file. Using Xcode, open the projects /ios/{projectName}.xcodeproj file (or /ios/{projectName}.xcworkspace if using Pods). Right-click on the project name and “Add files” to the project, as demonstrated below: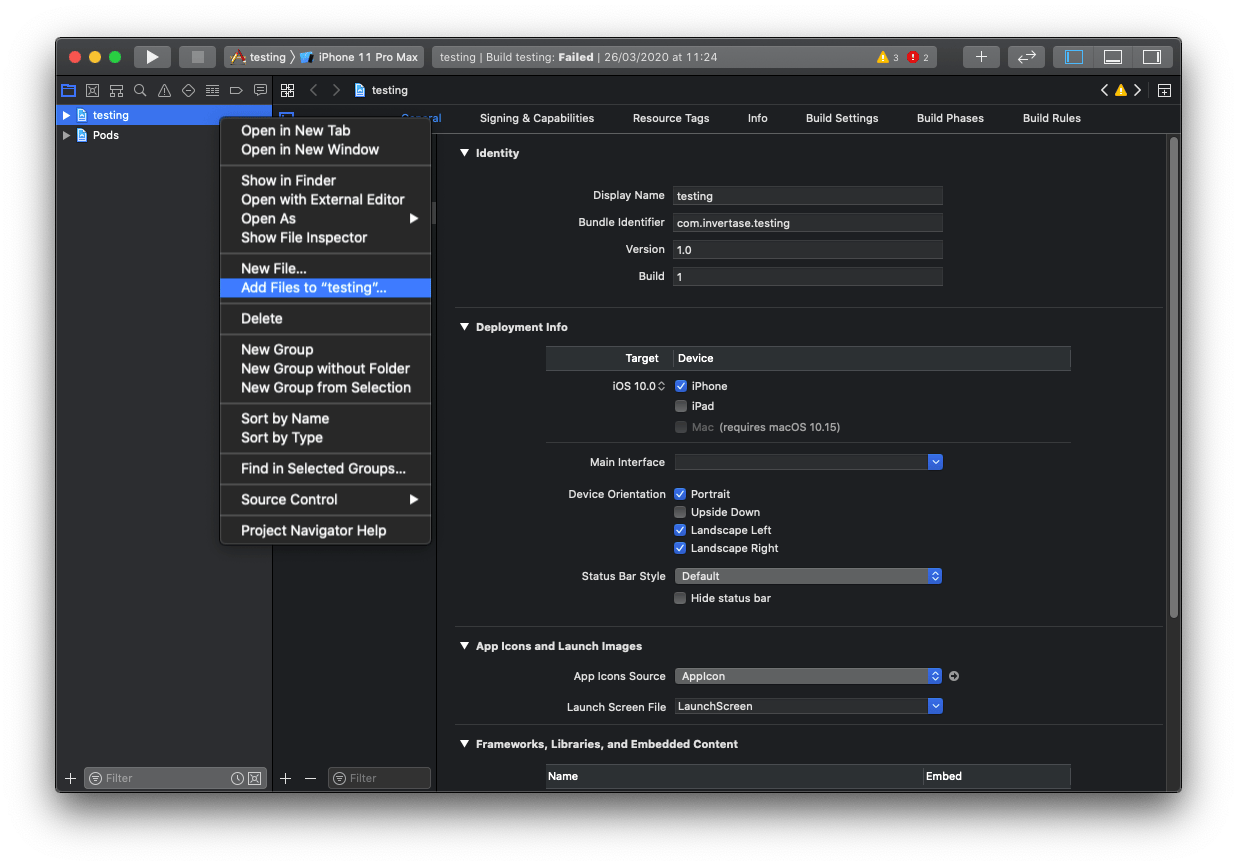
GoogleService-Info.plist file from your computer, and ensure the “Copy items if needed” checkbox is enabled.
- AppDelegate.m
didFinishLaunchingWithOptions method, add the following to the top of the method:
- Objective C
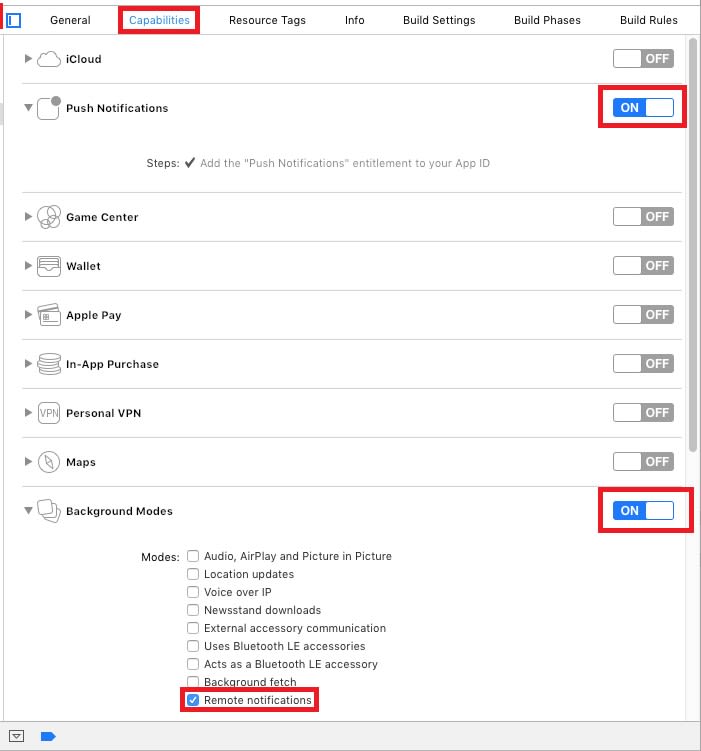
- Podfile
- React Native snippet
5. Subscribe to and u nsubscribe from topics
Refer to the JavaScript section above for subscription and unsubscription code.For Capacitor, Cordova & Ionic
1. Firebase Plugins For Cordova & Ionic, there are numerous plugins available via NPM which can be used to set up push notifications for your apps like FCM Plugin and Push Plugin. To setup Push Notification, you need to follow the steps mentioned in the Plugin’s Documentation. You need to make different apps on the firebase console for each platform respectively (Android, iOS). 2. Subscribe and unsubscribe process Refer to the JavaScript section above for subscription and unsubscription code. 3. Receiving Push notifications Here you can use the callback provided by the plugin. For eg: If you are using the FCM Plugin you can receive the messages as follows:- JavaScript
Converting Push payload to message object
CometChat SDK provides a methodCometChat.CometChatHelper.processMessage() to convert the message JSON to the corresponding object of TextMessage, MediaMessage, CustomMessage, Action or Call.
This code needs to be added to the onMessageReceived() method of the FirebaseMessagingService class.
- JavaScript
- MyFirebaseMessagingService.java
- AppDelegate.Swift
- React Native
- Capacitor, Cordova & Ionic
Attachments can be of the following types:
CometChatConstants.MESSAGE_TYPE_IMAGECometChatConstants.MESSAGE_TYPE_VIDEOCometChatConstants.MESSAGE_TYPE_AUDIOCometChatConstants.MESSAGE_TYPE_FILE